What Grok Build means now
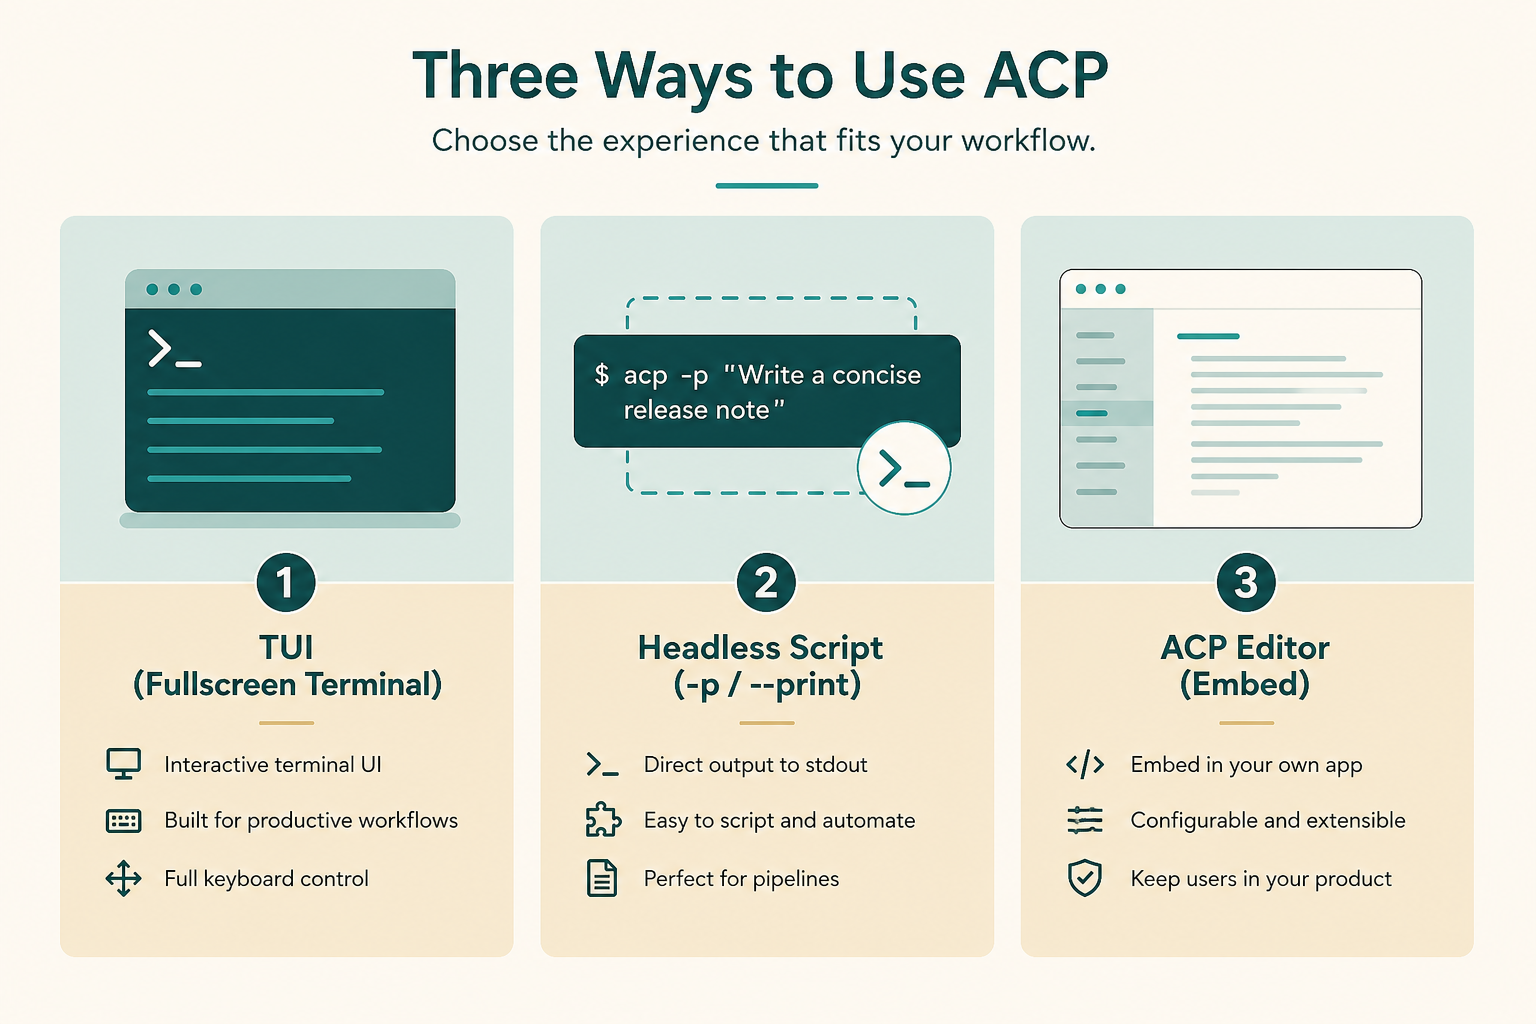
In public 2026 material, Grok Build is xAI's extensible coding agent: a fullscreen terminal TUI, the same grok binary headlessly in scripts or CI, and Agent Client Protocol embeds in other apps. It is not a chat page for pasting snippets, and it is not one editor plugin.
The public repo was open-sourced in July 2026. xai-org/grok-build is where you check commands, config, and release notes. Product docs start at the Build overview on docs.x.ai; install lives at x.ai/cli. This course only uses public, checkable usage.
Official overview text has said the same model family that powers Grok Build is also on the xAI API. Grok 4.6 has been named publicly as a model that powers it. Defaults, regions, and account gates change—do not treat a blog post as today's only answer.
Availability, login, and whether a paid tier is required follow official pages and your account. This course does not invent a hard SuperGrok paywall and does not quote prices. When sources disagree, trust official docs and what your machine does.
- Interactive TUI: run grok in a project for plan mode and slash commands.
- Headless: grok -p for scripts, pipelines, or bots.
- ACP: embed the same agent in other apps.
- User config commonly lives in ~/.grok/config.toml (Windows: %USERPROFILE%\.grok\config.toml).
Who this course is for
People who already use git and a terminal and want an agent to work in their own repo. You do not need prompt-engineering folklore, and you do not need to abandon your editor.
If you only want a syntax question answered, a normal chat product is enough. If you already live in Codex CLI or another agent, still read the comparison chapter.
Skip this series if you never open a repo. Stay if you will approve or discard a patch that touched your files.
- App developers who want reviewable local diffs.
- People who will put conventions in files an agent can read.
- People who later need issues, docs, or a browser on the agent (MCP chapter).
- People who want a headless command in CI.
Three ways to work, one config habit
Official overview treats interactive TUI, headless scripts, and ACP as doors into one product. Login, config.toml, AGENTS.md, skills, plugins, hooks, and MCP are often shared. Changing windows is not a new brain.
Pick the door you already inhabit: TUI if you live in a terminal; headless if the task is already a script; ACP if you only want to embed. This course leads with TUI, then headless.
Practical rule: finish login or an API key on one door, then do the first task there. Open a second door only after you have a reviewable diff.
- Open one door first.
- One AGENTS.md per repo.
- After skills, plugins, hooks, and MCP are set, grok inspect is the source of truth.
Suggested order
Short feature blurbs do not create operators. The eight chapters follow dependencies: product, install, a small reviewable task, then config, skills, and external tools.
Each chapter has sections, lists, and FAQ. Skip to troubleshooting when login or a process is stuck, then return.
If grok already opens a TUI, skim install. If auth is already broken, jump to troubleshooting.
- What it is: three ways of working.
- Install and login: official script, browser auth or API key, harmless check.
- First task: plan mode, small edit, diff, revert.
- Config and instructions: config.toml, grok inspect, AGENTS.md.
- Skills and plugins, including /skillify.
- MCP: only systems outside the repo.
- Versus Codex: choose by workspace, not hype.
- Troubleshooting: login, PATH, inspect, MCP, skills, plan gate.
How long this actually takes
A focused afternoon is usually enough to install, do one small task, and write one page of AGENTS.md. Skills and MCP belong on a second sitting.
Do not schedule “learn Grok Build” as a weekend production rewrite. This is a habit course.
- Install plus read-only check: often under an hour.
- First reviewable task: another hour, mostly reading the plan and diff.
- inspect plus a short AGENTS.md: about thirty minutes of facts.
- One skill and one read-only MCP: a later evening.
A cautious first look at the command
The public install page has used an official script on x.ai/cli. After install, the usual first step is cd into a project and run grok. Copy from today's page, not an old gist.
Headless usage is publicly grok -p, with an optional streaming-json output format. A first session is better as a read-only TUI question. Command-not-found is install or PATH, not the model.
- Check x.ai/cli the day you install.
- Open a new terminal so PATH refreshes.
- Ask about the current directory before write access.
Mistakes this overview tries to block
The expensive mistakes are social: ten MCP servers on day one, skipping plan mode on production files, pasting API keys into the repo.
The quiet mistake is cloning someone else's AGENTS.md. The agent will fail confidently on another team's test command.
- Three doors installed, none can list files.
- Production tokens in the first chat.
- Skipping the first-task chapter because a demo looked easy.
- Reading “open sourced” as “no account or key required”.
Overview checklist before chapter one
You need your own repo, a revert plan, and a chosen door—not a perfect environment.
- Pick TUI, headless, or ACP later.
- Confirm the repo may be sent to an external agent.
- git status works and you can revert.
- Keep official Build docs and x.ai/cli open.
- Open the next chapter only after the door is chosen.
How this course is written
The prose is original. Command examples use public install paths. Versions, menu copy, and plan names should be checked on official pages the same day.
This site ships Chinese default URLs and English /en prefixes. MCP and skills directory links are metadata; the browser will not install anything for you.
Figures are diagrams made for this course. They are real img tags, not CSS backgrounds.
- No invented star counts, prices, internal names, or hard paywalls.
- No requirement to enable writes and ten MCP servers at once.
- Secrets stay in env vars or a keychain.
- Official docs and your machine win conflicts.
What to do after the overview
Read the next chapter to lock product boundaries, then install. Skip ahead to install if you already can name the three ways of working.
Keep this page as the table of contents. Every chapter ends with prev/next and the eight-lesson list.